Wednesday, October 29, 2014

My Goal For Myself!

I just turned the big 21! Party! No, not even close actually I'm not the party type.

But I decided this was when I was going to change and actually SAVE MONEY! Those words together is something I haven't been able to put together. I love food, clothes, and make up. I mean what girl doesn't. I applied for a credit card and well I'm starting to think its was a BAD idea.

Though I'm not going to give up, I'm going to get my self together pay off my bill and learn to control myself. Because my goal is to

1. Save 75% of my checks
2. Only buy stuff when I need it
-small bills (I still live at home)
-pads
-contact solution
-hair products
-face wash
-medicine
-food for work on friday nights
-every day essentials I have to have

3. I don't plan on buy anything because I think I have to have it.---Will see how well this works! For this is my biggest problem!
4. I want to be smart about the things I do buy
-go to thrift stores
-use things I already have


5. And most importantly saving $10,000 in the next year! That doesn't seem like a lot but I'm a full time college student and work 25 hours a week at a restaurant (and I'm not a server). My boyfriend however works a way better job and he's checks will be paying/ going towards the saving account for our future house. My contribution will be more towards furniture and appliances.


So fingers crossed I can do it. And leave comments for any advice.


Wednesday, August 20, 2014


So I just got approved for my first CREDIT CARD, eek! But I'm pretty excited all at the same time.
Because this means I'm one step closer to buying a home. 

All and all the Credit Card is to build credit. Because I have NONE! 

Since I got approved, I went and bought checks (first time also) and am now waiting on both the card and checks to come in. Once they do I"ll be ready….well not yet.

I'm going to get money in my savings first (along with what I already have) but this is how I feel about credit cards myself
1. If I'm going to buy something huge (say a iPad) I want to make sure I have at LEAST HALF of the total of the item (iPad $600 have $300 saved) saved up before I go buying it. If you can have the whole amount saved and just pay in payments that is ever better. 
2. If you use your card for small things, DON'T buy so many small things that it adds up to a big monthly bill! 
3. BE SMART all my life, I've heard credit card debt is bad, don't do it. But for me I don't have an option I'm NOT renting (I have two dogs, and want to decorate), I don't know any other way to build credit beside get a credit card. 

So enough talking and on to the way I will be organizing my credit card payments, and monthly flow of money. 


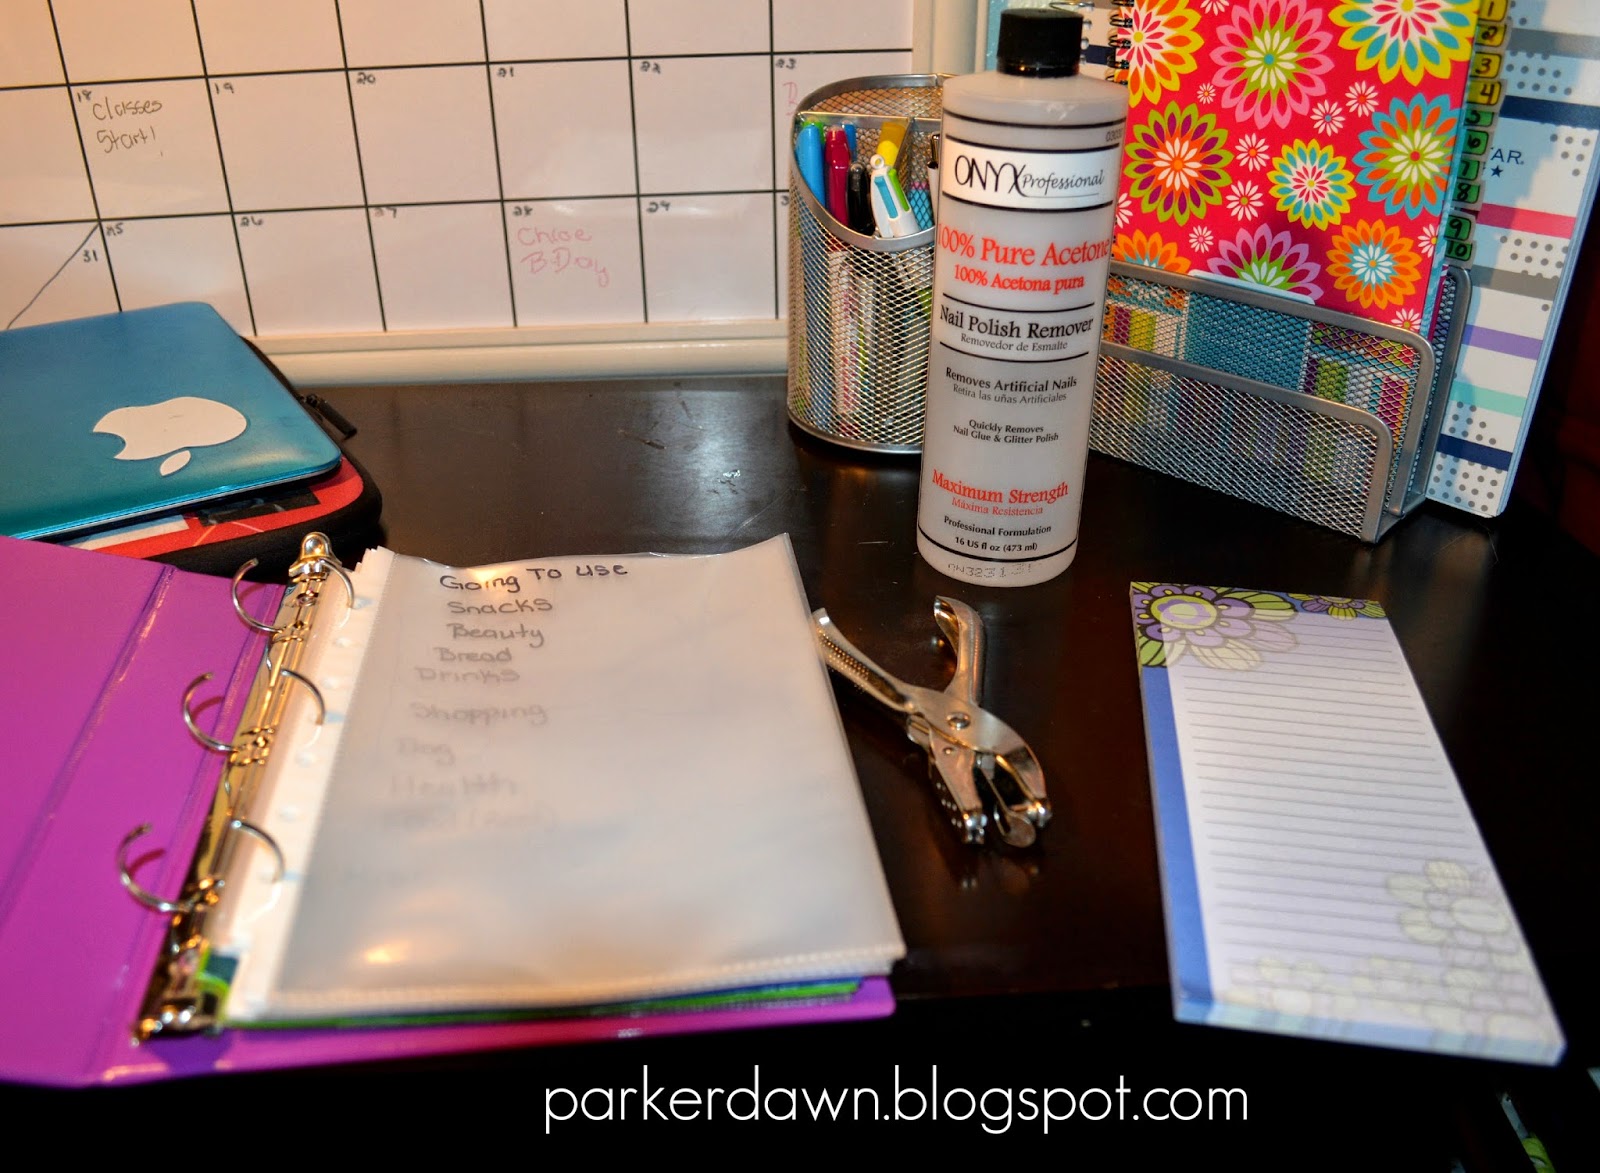
 I repurposed my coupon binder into my money organizer.

 So first thing first clean up the old labels
-Get acetone
-Cotton balls

Just go over the permanent marker with acetone and its back to normal.


Make a list of places/ Categories you shop at the most
-Target
-Wal-Mart
-Beauty 
-Gifts
-Crafts
-Extra 


Now that you have your list take your permanent marker and write on the clear pockets what receipt you want them to hold.

Now on to the actual money organizing of things…

I bought a "To- Do List, Groceries List" magnet note pad at Wal-Mart (for a $1) hole punched it and made that were I'll write my monthly income and subtract as I pay bills, or buy things. 

To make sure the holes worked in the binder I used one of the clear pockets and hole punched the paper. 


First let me break down what I pay a month:
1. $80 insurance
2. Soon to be Discover payments (hope to keep around $100 a month or less)
3. Around $25 on gas a week (as we all no gas changes)


So, how do I plan on using my To-Do list paper well as I get checks, I get paid weekly.
*mind you I'm a full time college student so I don't work a lot. 
$200    - Check I got paid for that week
-$100   - Discover bill
-$30     -Gas 
-$20     -Dinner 
__________
That leaves me with $50 till the following week when I get paid again.
However I would put $40 in saving and use the $10 for the rest of the week.

*Every week will have different expenses. But I'll be able to track how much I'm spending towards gifts, gas, insurance, Discover, and saving in a month. 

My goal:
To Keep Track of my expenses WAY better then what I do now
Build Credit- NOT GO INTO DEBT
Only buy/spend money on things I NEED
Save every last drop of extra money I have
Buy a house in two years 

I'm sure as I start using my monthly organizer more in depth I'll change it up a little. If I do I will add a update. 

Hope you enjoy, sharing is caring! 


Wednesday, August 6, 2014

College Help: Tips to get you through your first semester


When it came to my first semester of college I was terrified, I thought I was going to get lost, get over my head, or worst even drop out. 

But, I made it, I'm getting ready to start my 6th semester of college and I've learned a lot about how to stay organized, stay calm, and get a 3.8 GPA! 

So what are my tips well…

1. Go check out the school you'll be going to. Whether that be a tour, or just going to walk around on open house. Getting to see where all your classes are will help calm your nervous.
-If the school website offers a map print it out and use that (when I go to my university I'll probably do that) 

2. Invest in a good backpack, you'll be carrying a lot around and you don't want your back to be hurting. This site is a great place to hunt down the perfect backpack for you. 

3. Get a laptop or tablet, I can't begin to tell you how important this is. Some colleges do have computer rooms but not all are always available. Heck some even let you rent a laptop or tablet for the semester. Buying a laptop or tablet really depends on the your personal perspective. I use this one and I love it. 

4. Always have your computer set up with the right software such as 
    a. Microsoft Word  this lets you make PowerPoint, word documents, and excel all that you'll need for    college classes 
    b. At least two kind of search engines (safari, Google chrome, etc) I don't no if this will work for none Mac computers, but I say this because some of my power points and word documents wouldn't open on certain search engines. 
    c. Evernote this has been a life saver for me in college. I can scan my notes into my computer into my Evernote account and search my notes. Yes, you read right search my notes. It's incredible. Also I just got a email this morning, saying you can buy a pen to write with on your iPad/iPhone and it syncs to your Evernote account. I'm thinking save some trees and go this direction.  
   
5. Get a good planner one that has everything you need. These are really good one 
  • PlumPaperDesign Here you can pick your front cover, add your name and whether you want the classes inserted in or blank. This is my personal planner and I love it each class has it's own box and it's so organized.
  • I love this design so much 
    This is what the blank classes look like I do recommend this because college classes change every semester.

     
  • Erin Condren Life Planner a little on the expensive side but well worth it. The only reason I picked the PlumPaper was because of the classes. But Erin Condren Planners have a pencil couch, stickers and really awesome accessories. 
  • Target also has really cute planners 
6. My favorite part school supplies, in college its really all about how organized you are. Now I know everyone has their own way of doing things, but this is the way I've found works well for me. 
  • Have a separate notebook for every class (I am actually combining two classes in a 5 subject notebook this semester) I like this method because I no all my notes/ homework are in one place. 
  • Have a "Home" for everything. I use Flex fives star folders (I recommend the 2 inch one) they have individual pockets. I use my label maker and each class has their own tab so now I have a place for Homework, Important and just to store all that extra paperwork. 


  • Use something to hold all your pencils and post it etc. I use this and love it, its holds all my things post it, pens, white out, stapler, pens, pencils. 


  • But I also found in a YouTube video that, you buy this and put it throw the flex folder (the rings open up) and store everything here. I myself am going to try this, this semester and see how much I like it. 


  • Have something to store everything in after the semester is over. I use three ring binders and have them organized into subject, but I'm getting close to ten of those. So I'll probably go to a normal plastic bin.
  • Find a good pen to take notes with I use two
 
I love these pens. The Bic one has four colors light colors the other one has dark colors. I love these because it's easier to change up your color coding when taking notes.
The Sharpie pens write amazing there smooth and don't bleed through the paper. I honestly can say the Sharpie pens are my favorite.


  • The best notebooks are the five star ones I can't find a better one. 
7. The number one thing every college student needs to master is, Note Taking Skills  This part is very important because it's how you study (most of the time). My tips are mainly to write with good hand writing, use color coding, highlighters, and use the Cornell system it just has a good layout to find things later. 


http://we-get-shit-done.tumblr.com
*Honestly every class I take notes differently: If they have notes up on the board I write in the Cornell, if its just lecture I literally just write and hope to stay caught up, or I read the chapter ahead of time and t write my own notes (in the Cornell) and when I get to class I add to the notes as the teacher talks. The read chapter before has really worked for me.

8. Now, for the most important things I could share with you as a first time college student is simply.

  1. Don't stress- there is simply no reason to (I no its easier said then done) but if you take good notes study at least 45 minutes a day prier to the big test you'll be fine.
  2. DON'T CRAM: Your in college, therefore; everything you're reading/ studying will come back to help you. Especially if it's your major class. Actually study what your reading. 
  3. Get a tutor. I plan on getting one this semester because I'm going into a harder math class and I HATE MATH!   
  4. Keep everything I no seems a little over board but it really does help. I've gone and looked at my old papers to help me remember the layout. I've even used my old assignments to help me with others. 
  5. Keep your major classes, I'm a elementary education major so all of my elementary classes I've kept everything. 
  6. Take time in-between studying. Don't just study for a solid hour without a break you'll probably burn yourself out and you still have another five hours of studying to do. What I do is study for about 45 minute then get up and walk around.
  7. Don't get on social site, YouTube, or Pinterest in-between your breaks you'll get side tracked and forget to study. 
  8. Be organized.
  9. Have a certain spot to study, my first semester I studied on my bed and it was a bad decision. At night I couldn't go to sleep, my mind was constantly running. So I bought a desk and now I sleep way better because my bed is for sleeping not for studying.
  10. You'll change your mind, not even kidding. When you get to college some people know what their going for others not at all. So if you get two semester or even years in and change your mind, that's fine change it. It's whats best for you. I was going to college for Physical Therapy then I got one semester in and changed my major to Elementary Education. I can tell you I'm a lot happier with my decision to change and my family thought it was a better choice also. Update: I've actually changed my major again, I'm doing child psychology. And I'm really excited. But I'm one semester away from graduating with my associates in teaching so I'm cramming my last semester and I'll be graduating with two associate degrees in May 2015. I'M VERY EXCITED! 

Well, I hope my advice helps I'm not an expert at all but I have had my share of college struggles. So keep your head up, study hard and make some friends. 

Have extra advice then leave a comment. 

Sunday, July 27, 2014

DIY Gift for the guy in your life!


 The easiest cutest gift I've ever made for my
boyfriend. It cost me around $15 at most.
Its "Remember When" jar, I put all the great things about our relationship up to that time inside the jar.


-Glass jar at Michael's $7
-Baseball scrap paper $.59
-Extra colorful paper I had already
-Letters stickers $2.99
-Markers (already had)
-Baseball pull $5.99
-Sand Paper


First, take colorful paper cut it into squares and write all the great things you remember about your relationship.
1. First Kiss
2. Hugs


Second, take the baseball paper and measured it around the glass jar. I really had no measuring method. I basically just folded the paper to the width I wanted and went from there till I got it to the perfect size.


Third, I took the stickers letters and wrote "Remember When"

I also used some
glitter


Now for the fun part putting the baseball pull on the top of the jar.
-I used sand paper to rough the surface up to make it stay better
-then using a hot glue gun (other glues would probably work better but I had got glue on me) I glued the pull to the top of the jar and let it dry completely before I tested it out.
(also don't forget to cut the metal off the pull, duh)


And this is the finish product. It was simple and meant so much to him.


Thursday, June 26, 2014

Pen Holder for my new Plum Paper Student Planner

To solve my problem of not having to dig for a pen each time I want to use my planner I decide to make a pen holder.

And here's how…

First you'll need:
Scissors
the pen you want to use
a ribbon (it should be about a inch thick or to the length of the binder clip)
and a binder clip
hot glue gun (I guess I didn't take a picture, but you guys no what one looks like)

So first your going to measure the ribbon around the pen and clip like this

make a mark on the ribbon then cut that also if you use a lighter it helps prevent the ribbon from unraveling. 

Now your going to hot glue the ribbon down to one side then to another. 

like so….

And your done. It helps to put the pen in the ribbon as you glue it also. 


I clipped it on to the back covers. The pen stays put and it comes out easily. I was very excited it worked. 

Here is the pen I used it has multiple colors to it you can get a light color one and a dark color one at Office Depot. 
choose the also available in and you can get different colors 


Hope you enjoy. 


Plum Paper Student Planner Overview

 Plum Paper 
Mine is the:
Student Planner 

They also do different planners such as:
Teacher Planner
Regular Planner 
Family Planner
Meal Planner
Wedding Planner 
Fitness Planner

The Teacher planner is something I look forward to using once I become one. 


Different planners have different layout you can pick, so pick the one that matches your life. I bought the student planner for this reason 


You can have them custom put your classes in the box for an extra $5 or you can get them blank. I'm in college and my semesters change so I left them blank.

But I love this because each class has it's own box for each day and you get 7 boxes. I love it.
Its organized and I put the classes in order of when I go to them.


Here's how I use it:
Right now I only have summer classes so I'm only using two boxes.
The other boxes I just use to write meetings, work, appointments etc.
You could even put meals, workout in each box.


Another one of my favorite things about the student planner

Each week has a To-Do list, Quizzes, and Test on the other side its a small note section.

The To-Do list is really important I am a check mark kind of person. So I can always see what it is I need to do in one spot.

 And being able to write the test for that week off on another side and check them off when there done is amazing also.


Now to the actual planner itself. 
This is the Front Cover Part you can write your name. 

Then you get a over view of the whole year (2014 and 2015)


Then you get a note section before each month. I already used mine as you can see, its just a little up date on what the month holds. 


For each month you get a different color and the letter that matches the month. 

This is the month over view, you get birthdays, and events 
I used washi tape and those yard sale stickers for the test, quizzes, and projects. 


Then you get a few lined paper, and blank papers at the very end. 


Then you get a special dates in the back to write whatever you'd like for the next planner or for good events that happened. 

Now for the review part:

1. The price $31.00 seems expensive but it's not bad (shipping is $10.00) 
2. Its very durable
3. The color of the cover doesn't seem as bright as it did online.
4. The back pocket could be thicker, but I believe it will work very well. 
5. The pages have very good colors, the dates are correct (my boyfriend was afraid they'd messed it up) and also they have a disclaimer that if its messed up you don't get to return or anything. 
6. My favorite thing you can order the planner at whatever starting date you want if you want it to start at November then you can (however I'd order it a month before you plan on needing it. 
7. The shipping was very fast I was told 3-4 weeks. I ordered it on May 29th and it was at my house June 20th. 
8. You can add more pages of the lined or notes (I believe you can order extra pages I just don't know which ones) 
- for the teacher planner you could add more assignment sheets (up to 40 I believe) 
9. Over all I love it. I was very excited to buy this I will be ordering again. 


Tuesday, June 24, 2014

Help Stop Animal Testing

I have to talk about something today that I didn't even know I was doing. 

This little guy is my puppy Buckley Joe he's a Basset Hound Jack Russell Mix and I wouldn't ever want to hurt him he is my pride and joy.
These two are Brussier and Oakley our dogs we found on the side of the road and took in. They are the sweetest dogs you could ever meet. Were not sure what kind they are. 


So the other day I was on Facebook and I saw something animal related and all of a sudden I thought to myself 

     "Is my make-up and hair care I use tested on animals?"

I'm not doing to lie I did freak out when I realized almost ALL of my stuff make-up and hair was testing on animals. I couldn't believe it. I only had a small amount of items what weren't tested on animals. 
I was so ashamed of myself, but I didn't ever really think about it. 

I've looked at items in a store an saw Animal Free and thought wow that's amazing but I never really wondered if the stuff I'm using was animal free, till yesterday. 

But, even more happened when I woke up this morning I thought why not go organic also. Organic make-up and hair (not so much hair as long as its not tested on animals) so I'm making the switch TODAY.

And you can to here's how:

1. Go check out these list one for THEY DO TEST, AND ONE FOR THEY DON'T TEST. 
                    http://features.peta.org/cruelty-free-company-search/index.aspx
            there is a place you can search the brands or download the PDF file and search 

2. Search for every brand you have hair, tooth paste, make-up. EVERYTHING! 
     some items won't be on the list so as of now I'm still going to us it. 

3, Then if they test throw it away! Yes I said throw it away. 


 Look for these on everything you buy. 
And lets help stop animal testing.